|
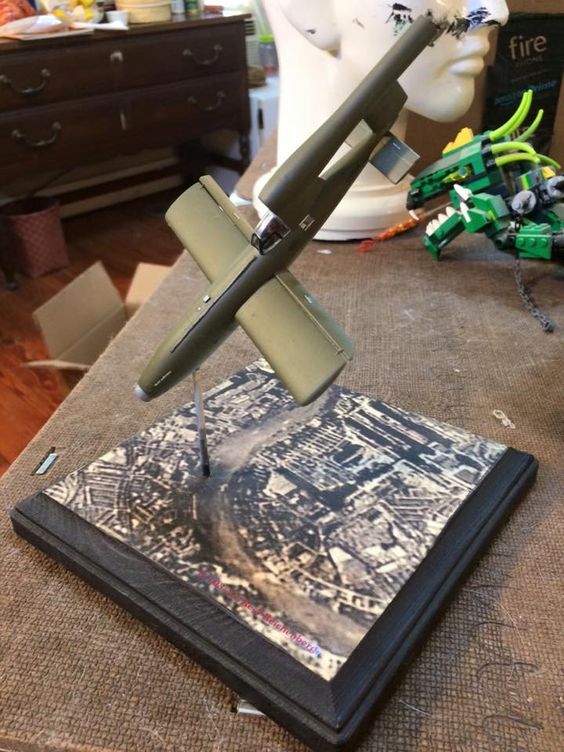
"The 155 mm Long Tom was a 155 millimeter caliber field gun developed and used by the United States military. It was produced in M1 and M2 variants (later known as the M59). Developed to replace the Canon de 155mm GPF, the gun was deployed as a heavy field weapon during World War II and the Korean War, and also classed as secondary armament for seacoast defense. The gun could fire a 45.36 kg (100 lb) shell to a maximum range of 22 km (13.7 mi), with an estimated accuracy life of 1,500 rounds." - From Wikipida.com I built this as a retirement gift for a US Army Artillery Colonel. I decided to replicate a Long Tom from the Pacific Theater of operations during WWII. The Base is a wooden plaque purchased from a craft shop and covered in plumber's putty to model the ground. The ground was then painted and covered with static grass, sand and flocking for model trains. I modeled the wheel tracks in the mud using the wheels from the artillery piece and used the same putty to add the clumps of mud to the tires. The crew was bought separately and added to depict the team reloading during a barrage. I wish I had more experience on weathering when I built this, I would have done so much more with the mud, but all in all not a bad project.
0 Comments
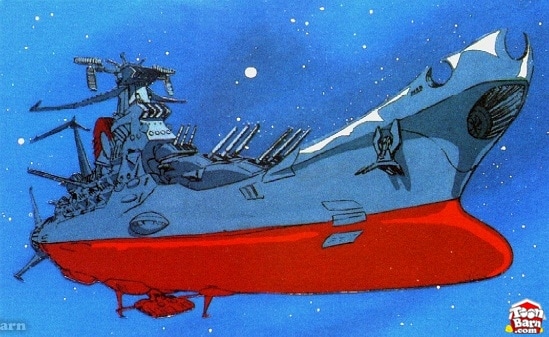
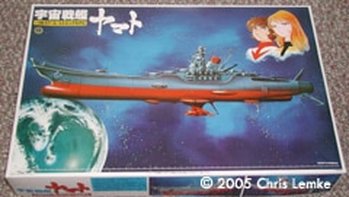
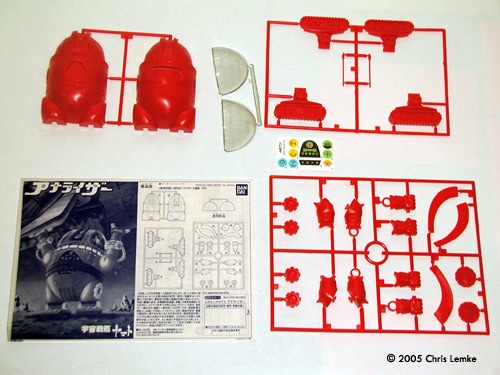
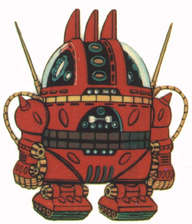
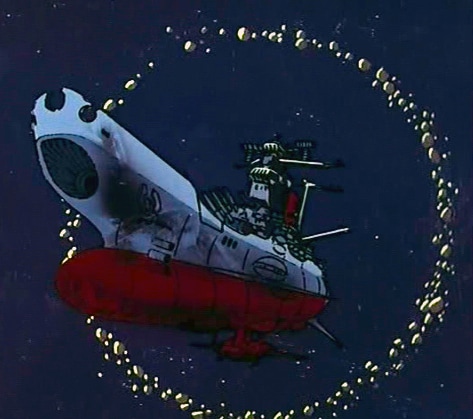
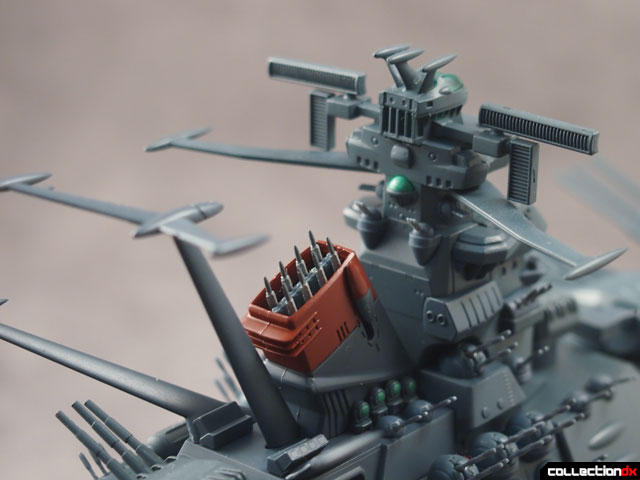
I found this kit on the HobbyLink Japan website. The kit is by Bandai a company well known for their quality and anime kits. Shipping was fast, price was good… on to the kit! What You Get. Two kits! No really, there is a small kit of IQ-9 a robot character from the series, but let’s start… The Yamato: The 1/500 scale kit comes in 4 trees, 2 hull halves, a deck section and pre-printed stand, for a total of 174 pieces in all, and this is a nice big kit over 20.86 inches long all told. The ship parts are molded entirely in battleship grey (how appropriate) and the 3 stand parts are molded in flat black. There are no defects or flash whatsoever, there are small mold lines but these are easily removed. All the major and some minor details are represented very nicely except for the raised panel lines in the hull (I would have preferred engraved panel lines). A couple of nice details that stand out are the massive amounts of “anti-aircraft” guns that flank the sides of the main conning tower (on the small scale kits many of these guns are often omitted), and the inclusion of three in-scale CosmoTiger II fighters, giving you the option the model them on the “catapults” or just display them alongside the kit for scale reference. There is only one small sheet of decals for the kit and these are for the stripe details on the barrels of the main turret guns. The instructions are very clear despite their being wholly in Japanese. The drawings and symbols are very clear for construction, however for painting the instructions are only useful to show you what to paint (by coloring the area to be painted in grey), those who cannot read Japanese will have to use the box art or other references for the correct paint scheme.
Assembly & Finish: Assembling this kit should be pretty straightforward: just like building a WW2 warship. The most difficult part will be the closing the hull halves cleanly and removing any seam mark, also the Yamato has retractable ‘wings’ on the hull for atmospheric flight, there will be left off so I’ll need to fill the slots for those as well. Most likely I will sand down the raised panel lines and inscribe them into the hull. The interior of the hull leaves plenty of open space if for lighting the kit, the base however has no way to hide the battery box so some extensive redesign on the base may be required. There may be painting instructions included in the directions, however I cannot read Japanese. That will not pose any difficulties as there are many web-based sources available, and the Series is available for purchase or rental on DVD.
Well there we go the next project all set to go onto the bench!
I’m off to watch some old Star Blazers episodes. Until next time, Keep Building!
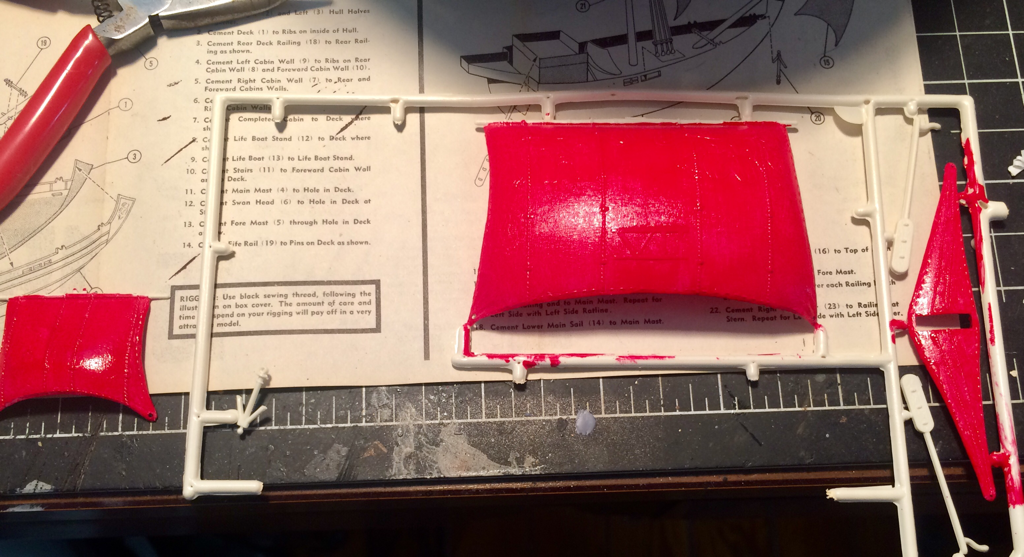
Next up are the final finishing pieces, and the rigging of the ship. First I painted up the steer-board (this is where we get the word starboard) the steer-board was an offset rudder. Then I carefully painted the booms on the sails and added a light wash to the sails themselves. Finely the steer-board was then attached to the main deck. Now onto the rigging! The main sail and topsail was rigged to the aft of the ship, there should be a rigging bar located there but I used the railing to run the lines. The main boom and the main mast support lines were all rigged to the top deck where the crew would control the set of the sails. The foresail boom and sail was rigged to the rigging bar mounted at the base of the bowsprit. I then trimmed up all the extra lines and got ready to mount the anchors. The anchors are mounted to the bow. While the anchors dry into place I worked on the base and nameplate. A quick dry brush on the nameplate brought out the text.
So there it is, the Ancient Merchant-er is all done, a kit that is 2 years older than the builder! I hope you are enjoying my build logs!
We have a BIG project coming up, one with lighting and modifications! So until next time, Keep Building! |
AuthorHi there, I'm Chris and welcome to my workbench. I've been building models since i was 6 or 7 years old. I thought it would be fun to share some of my projects! Archives
May 2017
Categories |
 RSS Feed
