|
Just a quick side post on an old project. I picked up this 1:1 scale prop of the Warehouse 13 Tesla gun at Wonderfest in 2014. If you haven't gone to Wonderfest you really need to its so much fun. I have several pictures of the model competition room on my Pinterest page here (https://www.pinterest.com/cslemke/wonderfest-2014/) if you're interested. I have no idea who made this kit but the merchant had a lot of prop kits. This kit came in 13 resin parts 8 brass rods, 3 plastic tubes and 2 paper 'decals'.
0 Comments
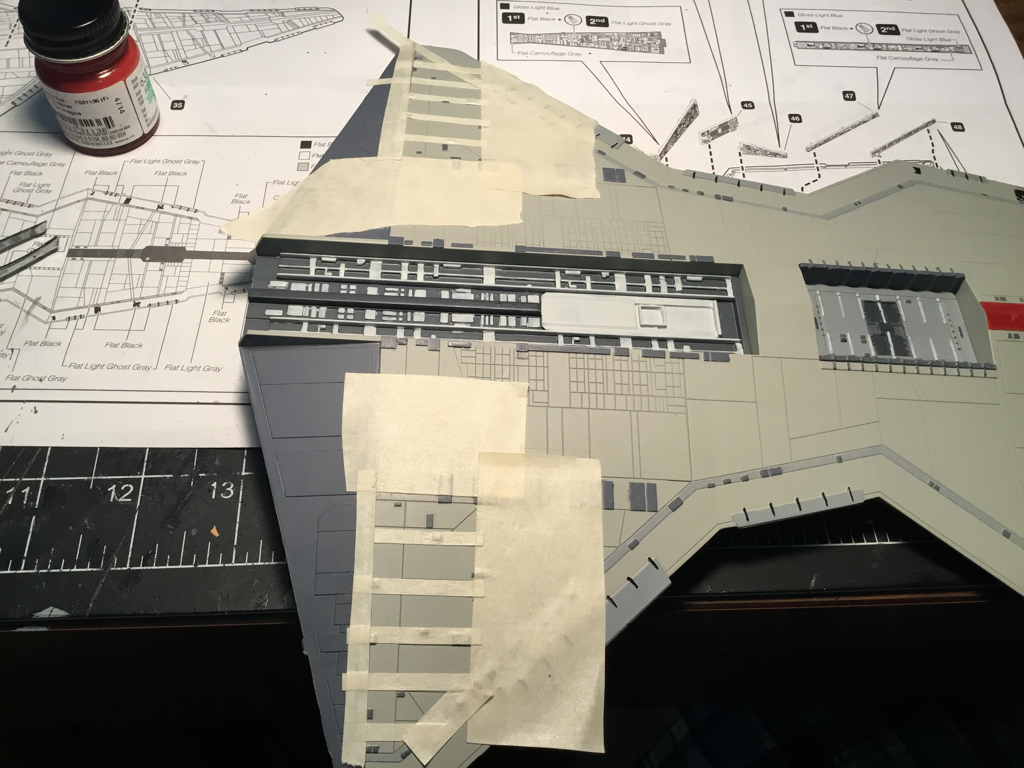
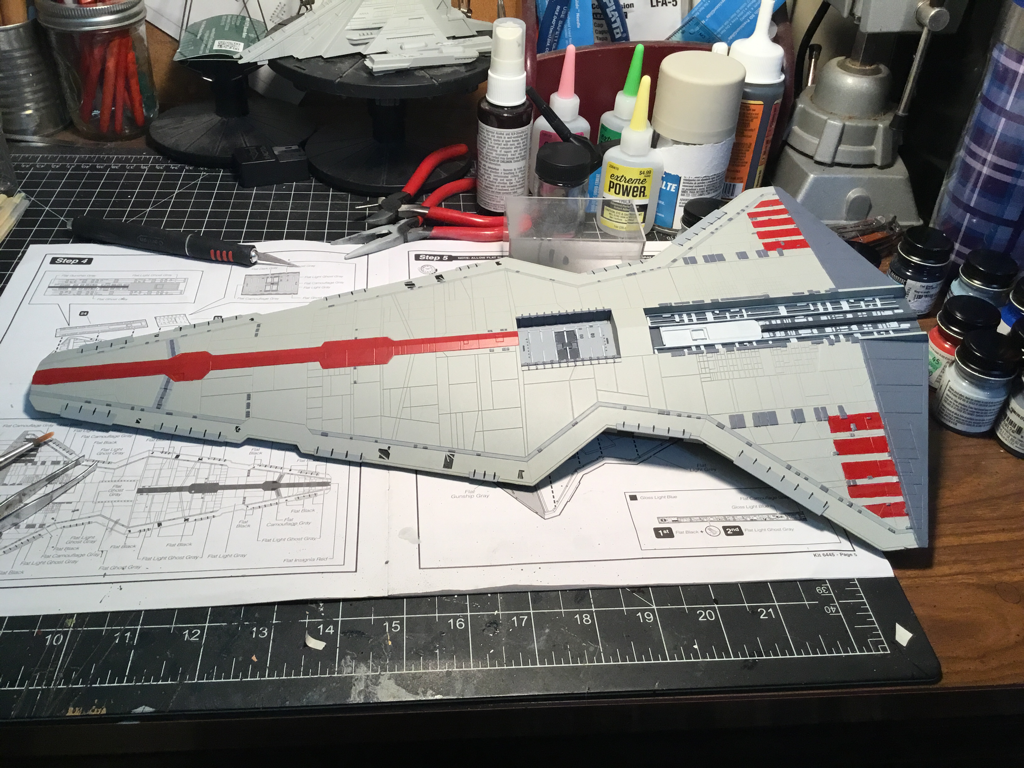
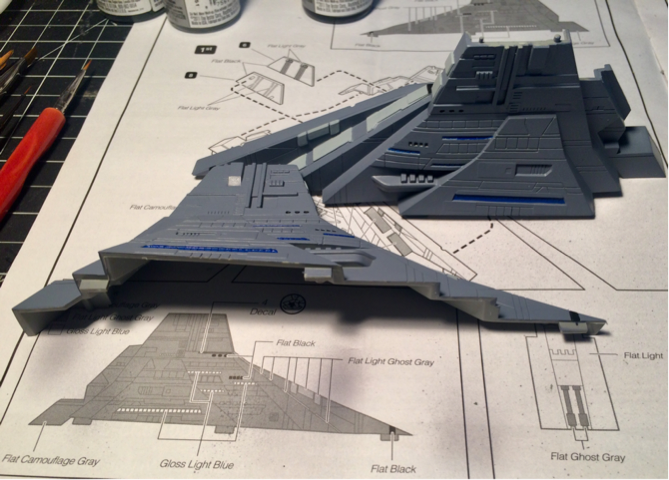
This will be a short entry, not too much done here just a lot of painting on the upper hull and dry-brushing the 4 engine pieces. One area I diverted from the instructions: the box art shows some on the panels on the upper hull a darker gray than the rest of the hull so I matched those panels and in the move some of the details on the red-stripe were the hull gray or darker gray and not red so I added that detail as well. The next steps will involve building the engine deck, so as always stay tuned and Keep Building!
Well there is a lot of fiddly painting on the hull, the instructions even tell you where to dry-brush for the side wall details. I love that. So we begin with the prep for all the painting. The hull halve were sprayed the light battleship gray the plans called for and the side walls were painted a matte black for dry-brushing, and left to sit overnight to dry completely. While the hulls were drying I painted up the detail inserts for the bottom hull, the landing/launch bay and the engine detail panel. I used 0, 00, and 000, brushes to get to all the little panels. With everything dry I cemented the detail panels into place on the lower hull, I then went to work painting all the detail lines, plates and insets. Take your time here it’s pays off to have to paint several thin coats onto the details. Next I masked off the red markings, the center line is outlined by inscribed panel lines but the 10 (5 per wing) wing stripes have to be matched up the the instruction pictures… I put on and removed the masks 3 times before I was happy.
With the hull painted I set it aside to focus on the details on the side walls. A word on dry-brushing, I use a very soft brush round tipped, I have the same brush in several sizes, and these are only used for dry-brushing. When I load the brush with paint I swipe it across my paint cloth until nearly no paint can be seen coming off, then with light quick strokes in the direction the light should be falling I build up layers of color until I reach the level of visible detail I like. Again here it is best to really take your time and have to brush on multiple layers than to obliterate the details with too much paint. The instructions then called for the base wall of the side wall to be a flat camouflage gray, so working under my magnifier painted in the solid color make sure not to mess up my dry-brushing, finely gloss yellow and blue was added to the windows and lights around the landing bay doors. 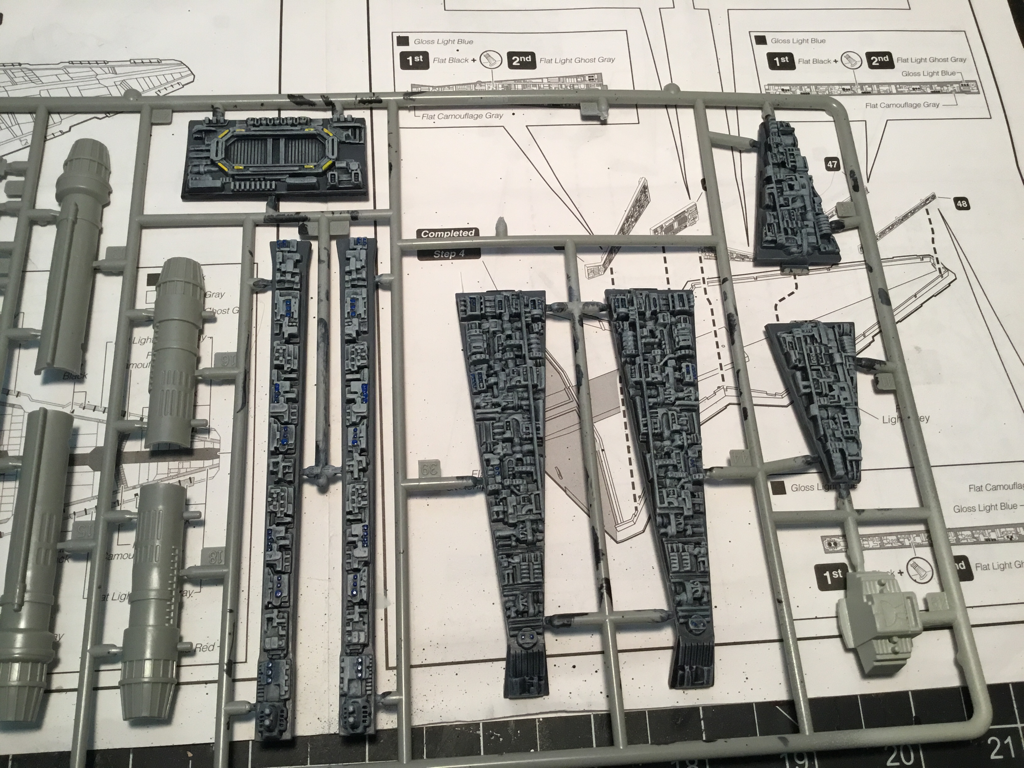 The last thing accomplished was to add the side walls to the now dry lower hull. With this finished we’re up to step 6&7 in the instructions. 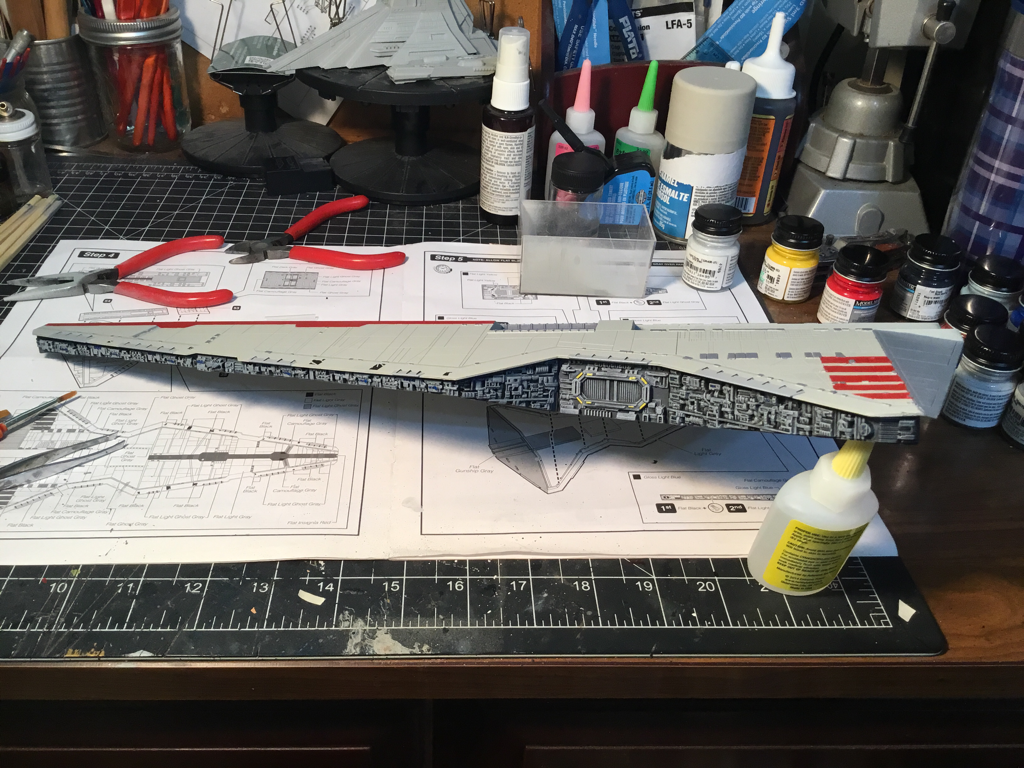 Tune in next time, until then:
Keep Building!
Well here you go my first build log! Bear with me I hope to get better, and if you have any advice on what you would like to see me put in these logs plese comment and let me know. The Revell Republic Star Destroyer is a pretty nice looking kit, it’s well molded and very crisp with very little flash, the parts look to have a nice amount of detail. According to the instructions a good deal of this kit is going to be involved with painting, there are a lot of painting details. I’m building this one directly from the box no additions or changes. Here we go, my first blog post!
This first post will not be a build log, but just a bit on a previous project. The first kit I can remember building on my own was the Gigantics Rampaging Scorpion. I was 6 or 7 at the time and my dad bought me this kit to keep me out of his hair while he worked on his 1/96 scale USS Constitution. I stumbled on the AMT Reissue of this kit at flea market and had to have it! Of course now-a-days I tend to pit a little more into my kit building than I did when I was eight (that poor scorpion was so covered with glue...). I decided to make an homage to the classic 1050's giant monster movies this kit was meant to represent, so first I replaced the cars with 1950's era HO Scale vehicles: the Carmen Ghia replaced the '70's Corvette in the scorpion's claws while a yellow and white Bel Air makes its escape. I wanted to match up the box art so I created a newspaper as the display's nameplate. I used Photoshop, and some images from 1050's newspapers to create the folded paper, which once assembles and weathered was coated in white glue to harden the entire nameplate. I stuck with the original cardboard display pieces provided in the kit and stiffened them using styrene sheets cut to shape and affixed to the cardboard after I flattened the pieces. The buildings were dry-brushed to bring out the details and mounted with brass rod into the base board along with the scorpion itself and the Bel Air. The Carmen Ghia was crushed between two mental plates in a table vice to mimic the scorpion's claws. The scorpion was painted to match the black emperor scorpion with gray tinted dry brushing and reddish brown coloring on the leg and claw tips, the eyes were painted a gloss black. The scorpion was attached to the display by a brass rod to keep it in the proper position with his tail crushing the building behind him. All in all this was a very simple kit to build, the buildings went together with no problems I had to add some styrene sheet pieces to cover the open holes in some of the damaged buildings so you couldn't see there was nothing inside, the scorpion assembled easily and even had a platform to mount the legs in their correct positions. For me this was a fun kit to revisit a memory from my childhood. I hope you enjoyed my write-up about this project. Check back to see my next post a build log on building the Revell Republic Star Destroyer. Until next time, beep building! |
AuthorHi there, I'm Chris and welcome to my workbench. I've been building models since i was 6 or 7 years old. I thought it would be fun to share some of my projects! Archives
May 2017
Categories |
 RSS Feed
