|
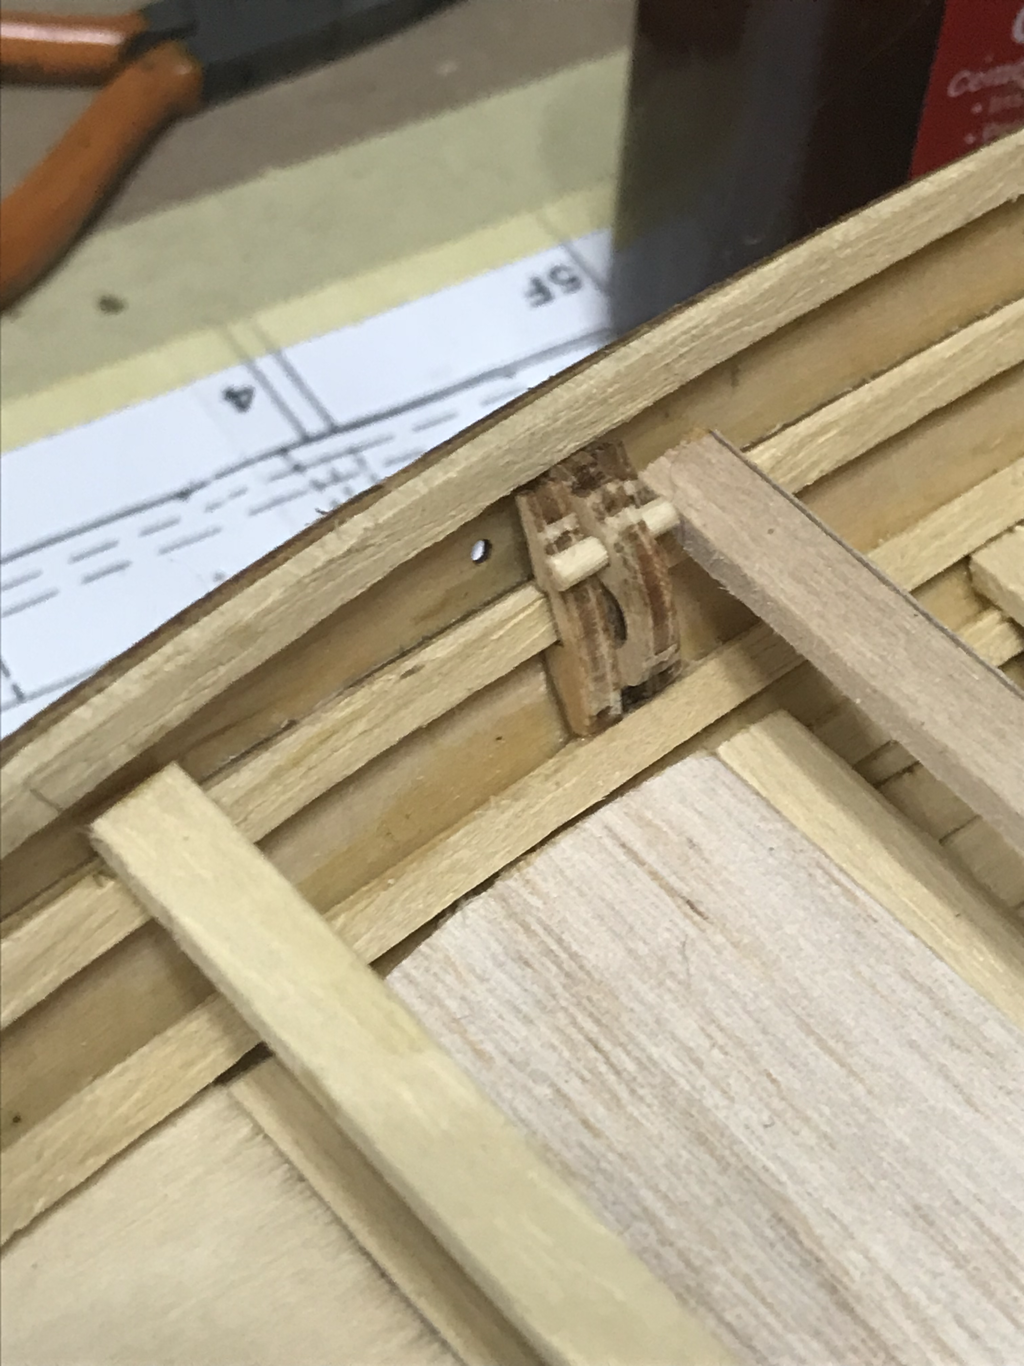
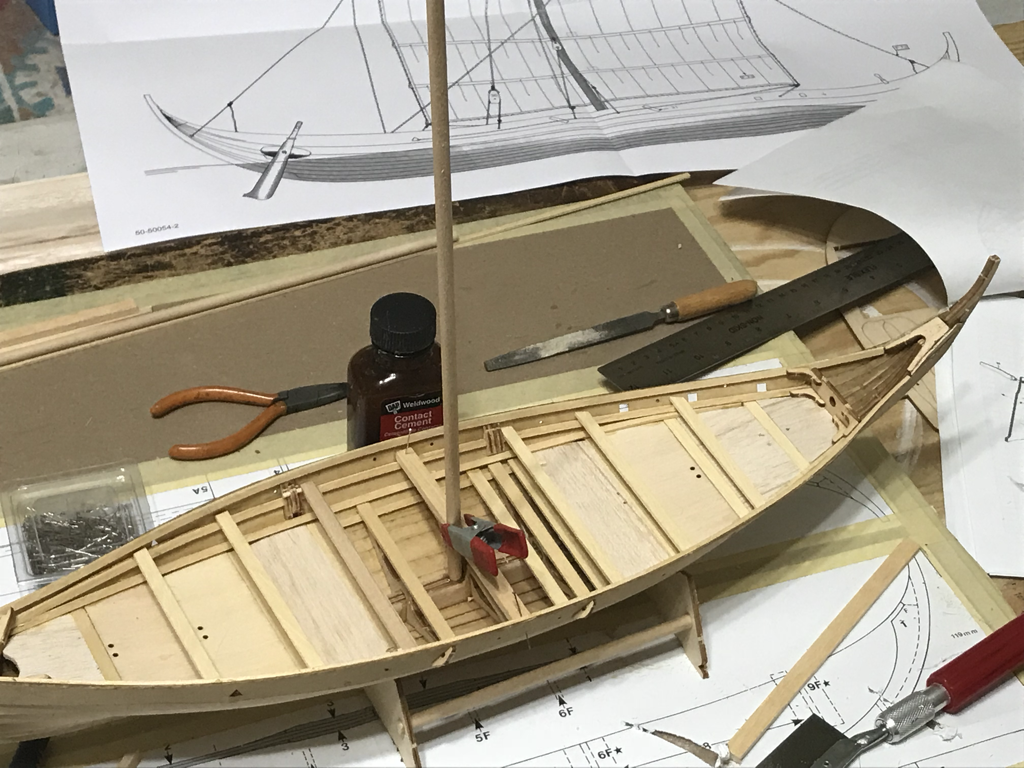
Sorry all things have been a bit hectic and my posting schedule has been a bit off. I’ll try and do better! Well hold tight this is gonna be along one!!! With the hull completed the next step is to add the rib supports. Each support must be sanded and fit individually to be snug to the strakes and the keel, and most importantly MUST be placed in their exact location careful measurements need to be made. The stern and bow plates are then glued and clamped into place. Next up we add the forward top plate .this tightens the bow strakes and lock them into place. The piece is glued, clamped and pinned into place to keep everything tight while the glue dries. While drying the gunnels are added to the inside of the hull, the cross beams and the benches will rest on these beams. These are cut and fitted to the curved hull, and clamed into place as the glue dries. Clamps are my friend! With the glue all dried and all the ribs, gunnels and plates in place the cross beams are added next, the care taken when placing the ribs pays off here as each cross-beam will fit onto the ribs and be the correct distance apart for the deck plating that comes next. 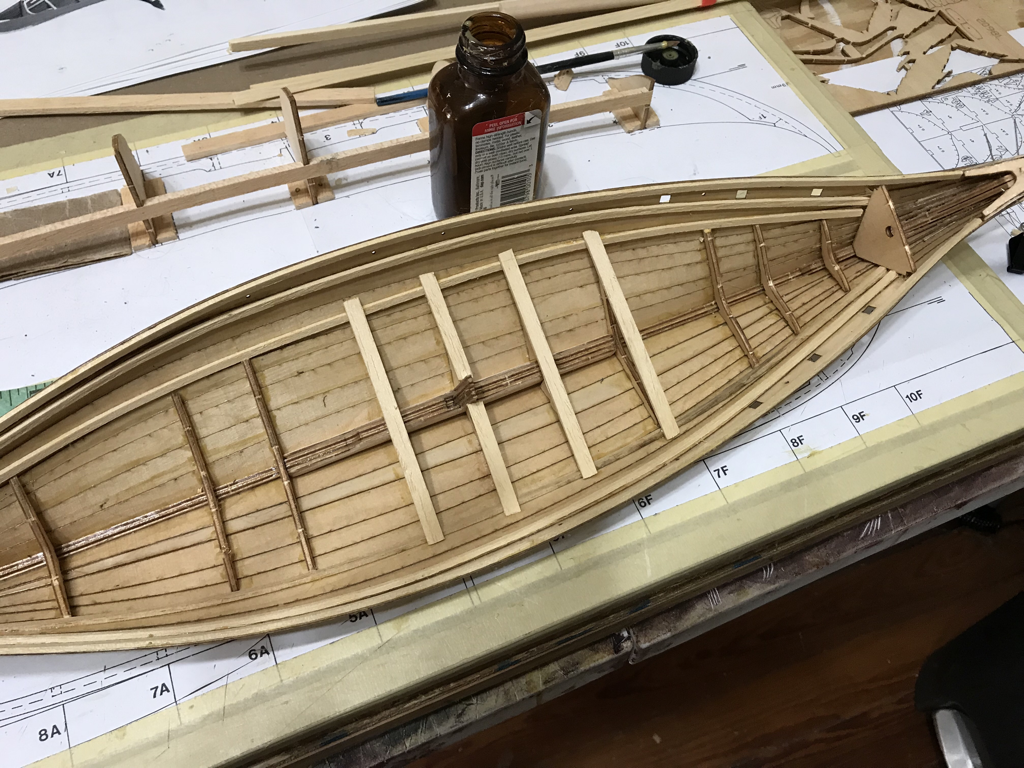 Once the cross beams are in place and while the glue is still tacky the deck plate are added, with the cross beams glue not fully set some minor adjustments can be make to make the crossbeams and the deck plate fit nice and tight. Now we set everything aside for the glue to cure. The crew benches come next, these benches rest on the next gunnel beam each needs to be sanded to fit the curve of the hull. The center mast support beam is mounted directly over the mast boot with a cutout for the mast to sit into. This cut out needs to be measured properly to keep the mast from leaning to the right or left. While the benches are drying the rigging cleats are assembled and put into place, along with the gunnel supports.
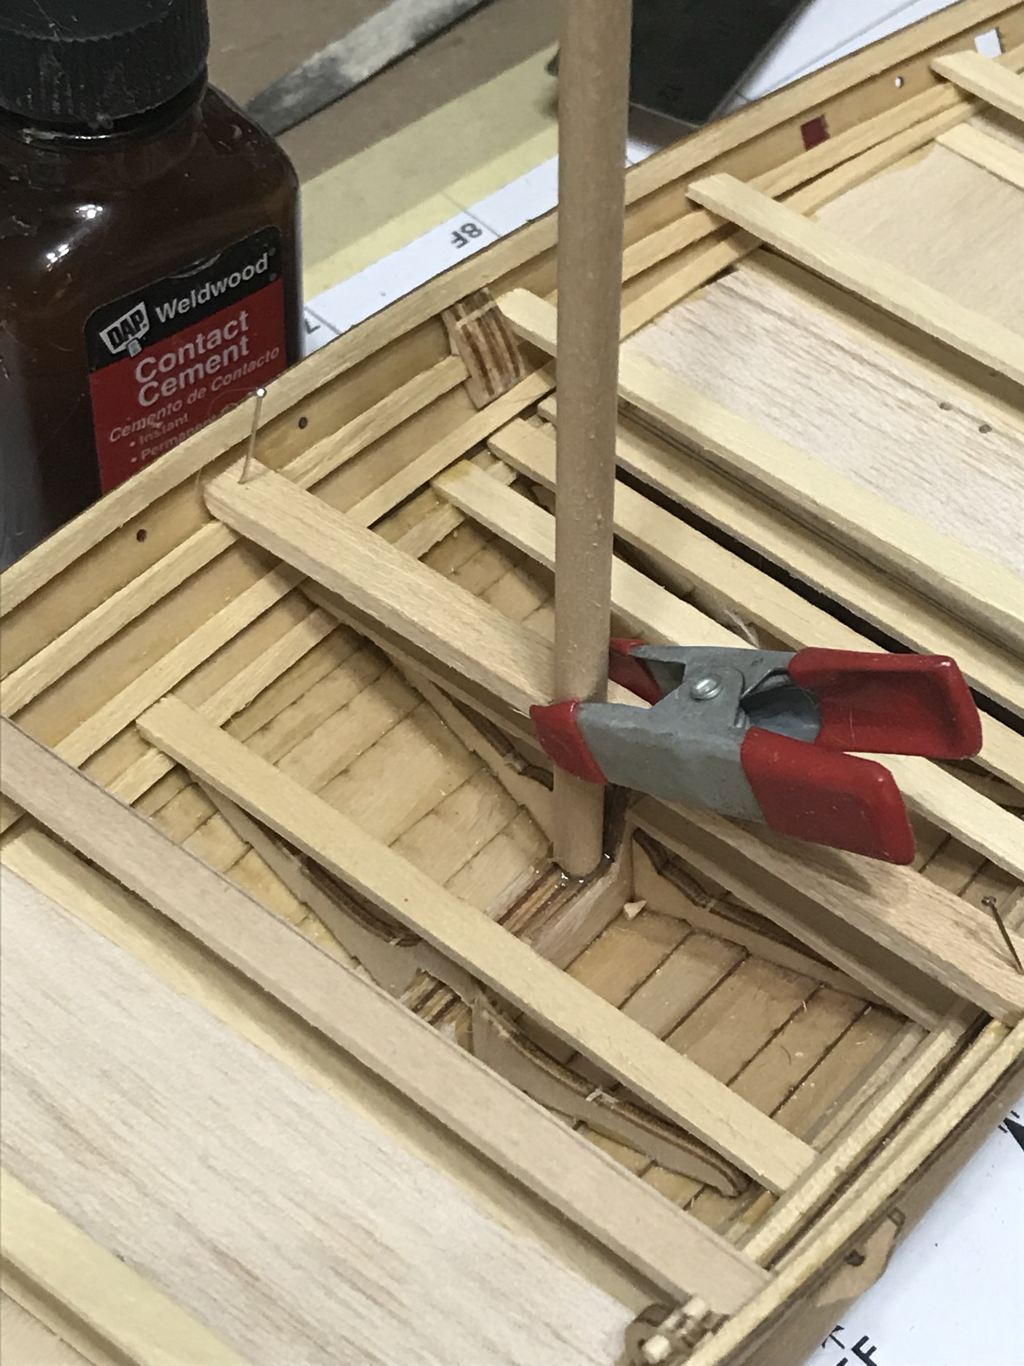
The mast is now seated into the mast boot and the cross support and clamped into place.
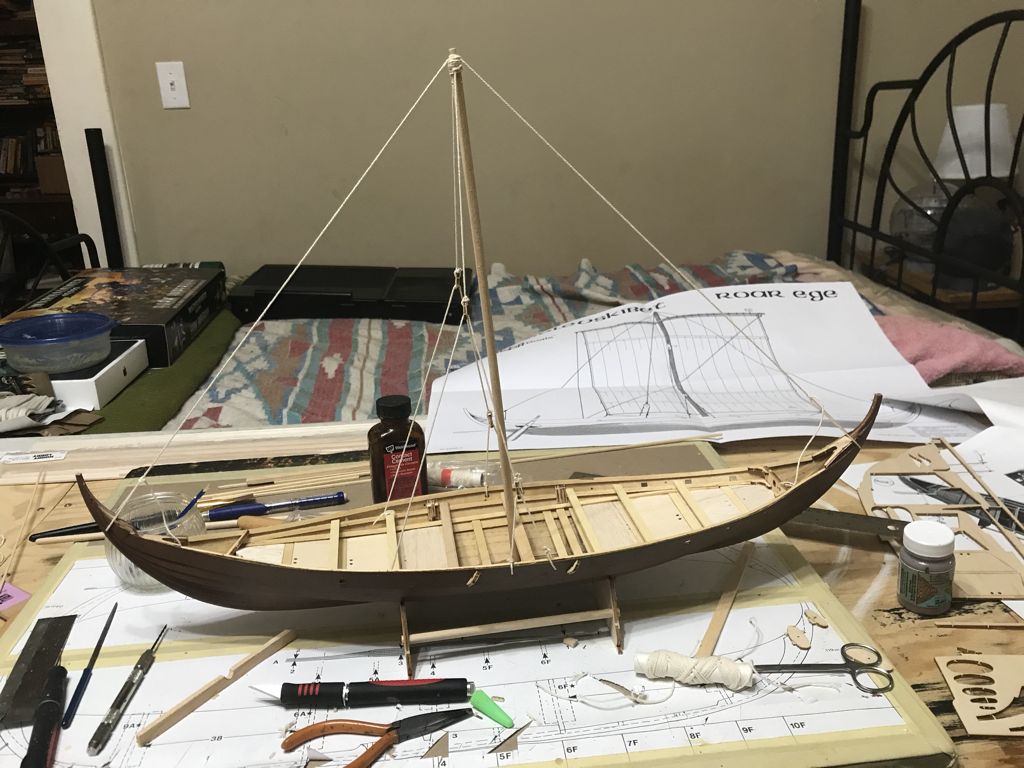
With all the clue curded, I added a coat of paint/stain to the hull and started all the rigging. The standing rigging is the primary support for the mast and keeps everything nice and tight. All the excess rope is coiled and glued into the forward and aft rope holds. The standing side rigging is in 2 parts for each side, the mainline running for the mast top to a pulley-lock and the support lines that are ties off to the hull and to one of the benches, this allows of the tension on the mast to be adjusted in rough weather.
The canvas sail is given a running stitch around the top and bottom fold seam, and tied to the main boom. The boom is aligned to the mast and the mast and boom connect is tied into place. The mainsail line is attached to the boom and run through the mast and down to the jib pulley. The pulley lines are run from the left and right cleats and support through the hull, tases control the height of the boom and sail. The excess ropes are coiled onto the deck. Finely the sail tack lines ar attached to the sail corners and the boom ends and run through their cleats on the hull. With the final addition of the steer-board the Roar Ege is ready for her voyage. I hope you enjoyed this build. It was a lot of fun. Until next time, as always Keep Building!!
3 Comments
Dave
10/17/2018 01:28:06 pm
Chris, this is the first Billings Roar Ege build that I've seen online. You've done a great job documenting your build. I'm going to refer back to this website often as I am just starting to build. Great pictures. Thanks again and I'll be sure to post any questions that I have along the way.
John
2/12/2021 01:30:34 am
Chris
Christopher Lemke
2/12/2021 02:00:23 pm
Hi thanks for posting, I’ve moved formats for my modeling I’m now on YouTube Leave a Reply. |
AuthorHi there, I'm Chris and welcome to my workbench. I've been building models since i was 6 or 7 years old. I thought it would be fun to share some of my projects! Archives
May 2017
Categories |


 RSS Feed
